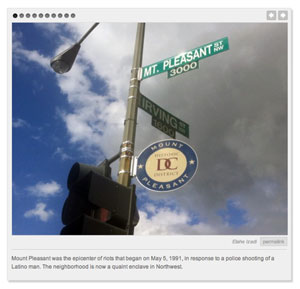
When using this plugin in conjunction with an Argo theme, recommended dimensions of slideshow images are the same as recommended dimensions for large images in posts (the ideal photo is 620 pixels wide and 360 pixels tall; height matters less than width in this case), and must be saved in JPG format. While WordPress can “downsize” images that are larger than 620 pixels wide, it cannot “upsize” or make small images larger, so always upload images 620 pixels wide or larger.
The slideshow presentation has been optimized for horizontal images cropped at a 3×2 ratio, so whenever possible use a horizontal image. The slideshow will support other dimensions, but again: the ideal horizontal crop is 620×360. If you must use a vertical, the ideal crop is 300×400. Finally, the depth of vertical images should not exceed 400px.
Step 1: From any post editing screen, click the Add Images icon.
Step 2: Click Select Files. Navigate to your images on your computer.
Step 3: After locating the folder containing your images, hold down the SHIFT key and highlight multiple image files by clicking your mouse (MAC instructions). If you are on a PC, hold down the CONTROL key and highlight multiple image files. Click OPEN when done.
Step 4: After the images have been uploaded, you can now begin to add titles, bylines and captions to each individual image. Click SHOW to the right of each image to toggle these controls open.
Step 5: Add a TITLE. This is the title of the image. In the ALTERNATIVE TEXT field, add a byline or credit for the image. Add a caption in the CAPTION field. The DESCRIPTION field is not displayed on the site, but, might be useful for adding internal notes not visible to the public about the image. Repeat these steps for each image that you uploaded. Remember, you can toggle open these controls by clicking the SHOW link to the right of each photo.
Step 6: When you have added TITLES, BYLINES and CAPTIONS to all images, scroll down and click SAVE ALL CHANGES, then close the Add an Image window. Place your cursor at the spot in your post where you’d like to insert the slideshow.
Step 7: Reopen the Add an Image window, and click on the link at the top that says “Gallery (12)” – the number in parentheses should correspond to the number of images you’ve uploaded. Here you can click and drag on image names to reorder them in the slideshow.
Step 8: While in the Gallery tab of the Add an Image window, scroll to the bottom and look for “Gallery Settings.” Leave the default settings in place; they don’t really do much in any event. Click INSERT GALLERY.
Step 9: Finish producing your post as usual, adding a headline, additional text before or after the slideshow, setting a featured image, marking the post prominence, etc. In WordPress’ WYSIWYG editor, a placeholder for the slideshow will appear in your post. (Note: Unless there’s a compelling reason not to, reuse the first image in the slideshow as your featured image.)
Step 10: Done! Enjoy your slideshow by previewing or viewing the slideshow post.
Important Note: If you want to add images from Flickr or any other third-party site, you first need to download the images to your computer. Save them in a folder and upload them using the instructions above.
Troubleshooting
My captions are missing
Make sure you entered your caption into the caption field and not the larger description field on the edit image screen.
My photos are misaligned
Review the installation instructions on this page to verify that you've set the large image width and gallery width accordingly.
My image is showing up smaller than the large image size I added to Settings > Media page
WordPress does not scale up images (make them appear larger). If you upload an image that is smaller than the large image size you set on the Settings > Media page, the image will be displayed at its full size (the size of the image when you uploaded it to WordPress)
